• Skip to primary navigation
  • Skip to main content
  • Skip to primary sidebar

Make Healthier Choices

Helping people Make Healthier Choices about real-food choices for optimal heath.

SEARCH

  • Home
  • Welcome
  • Free Body Scan
  • My Metabolic Meals
    • My Favorite Metabolic Meals
  • Recipes
    • Beverages
      • Audrey’s Pine Needle Tea
    • Bread
    • Candy
    • Desserts
    • DIY Recipes
      • DIY – Body
      • DIY – Household
      • DIY – Pets
      • Essential OIls
    • Fermented Foods
    • Free Recipes
    • Fruits
    • Main Dishes
      • Katherine’s White Chicken Chili
    • Meats
    • Pet Recipes
    • Salads
    • Sauces
    • Side Dishes
    • Snacks
    • Soup
      • Thai Soup – Immune-Building Soup
    • Spices
    • Vegetables
  • Recipes by Category
    • Gluten-Free
  • Blog
    • Articles
    • Ingredients & Substitutions
    • Reviews
  • About
    • Affiliate Disclosure
    • Contact me
    • Disclaimer
    • How I Overcame Sickness
  • The FUN Stuff
    • Sweepstakes
    • Take a Quiz
    • Free e-Books
  • Save on My Favorite Products
  • V Info

Side Dishes

Thai Soup – Immune-Building Soup

September 2, 2021 By Recipe Renegade Leave a Comment

Share

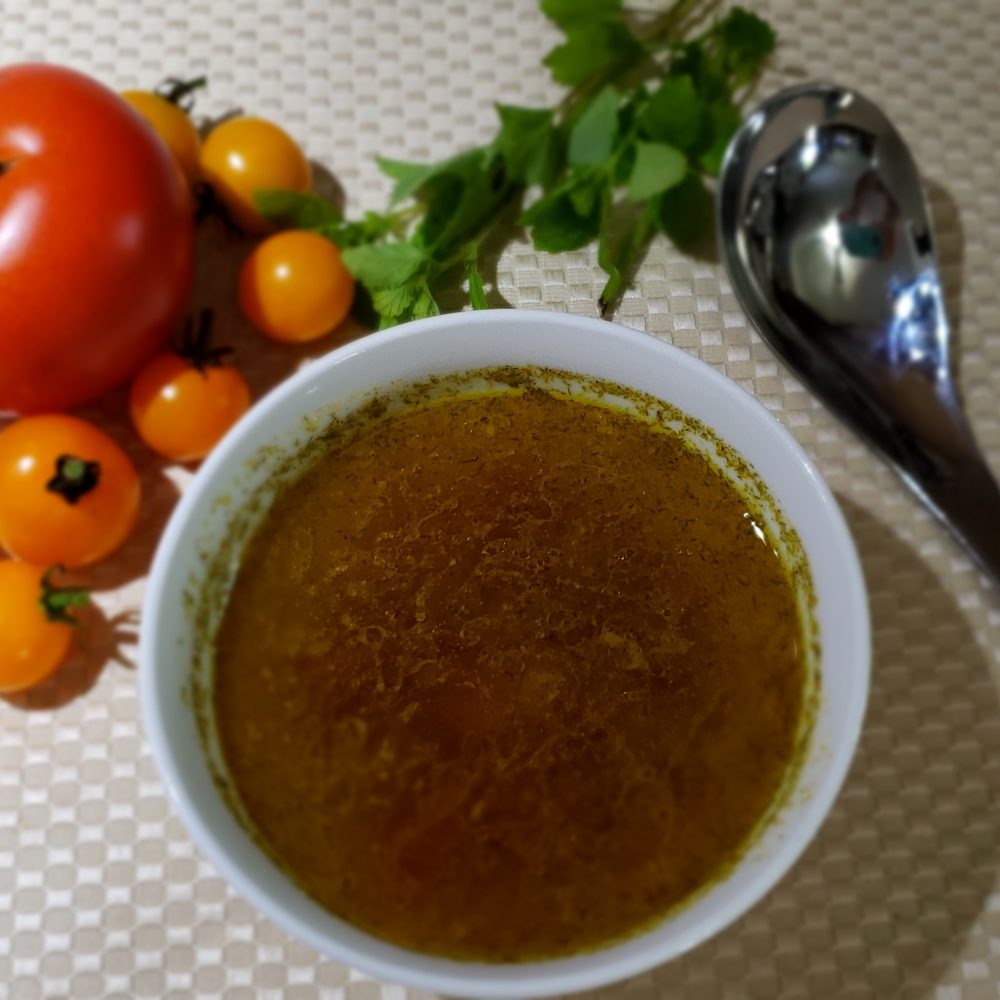
A friend, Lynn Parker, gave me the ingredient list for this recipe. She calls it Thai Soup, but I call it Immune-Boosting Soup.  I cook all of my bone-in chicken in my Instant Pot, which gives me a beautiful bone broth.  If I use my Instant Pot, pot, there’s no need to further cook the bones. Chicken cooks in about 25 minutes, and produces a beautiful gelatin.


Make it Strong or Weak

I made an extremely strong batch of this soup using water instead of chicken stock/bone broth, and froze it in small batches in 16 oz freezer-safe canning jars. When I make a bigger batch, I use the larger freezer-safe canning jars. After thawing, I added the fresh bone broth and then heated it–YUM. If you find you made your batch too strong (too much garlic, ginger, lemongrass, or cayenne), just add more chicken stock/bone broth or even some water.

I bet you’ll want to double or triple this recipe and freeze it or can it. If you freeze it and plan to use glass jars, be sure to use ones that are safe for freezing. The freezer-safe jars are the one that are completely straight and don’t have a shoulder.

I’ve added Thai Soup #2 with the amounts I used in my latest batch. This batch could have been a little stronger–maybe less water.

Thai Soup
 
Save Print
Author: Recipe Renegade
Ingredients
  • Bone Broth or Chicken stock
  • Garlic
  • Ginger
  • Turmeric
  • *Tomato
  • Cayenne
  • Onion
  • Mushrooms
  • Carrots
  • Lemongrass, Dried or Fresh
  • *If you don't have fresh tomatoes, it's okay to use canned.
Instructions
  1. After cutting up ingredients into bite size pieces, slow simmer in a pot for about 45 minutes, being careful not to boil the broth/stock away.
3.5.3251

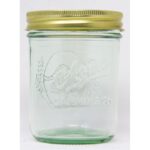
16 oz and 24 oz Freezer-Safe Jars:

16 oz Freezer-Safe Jar
24 oz Freezer-Safe Canning Jar

Recipe With Ingredient Quantities – Thai #2

You might want to adjust quantities in this recipe, but this gives you a good starting point. I’ve specified Shitake Mushrooms in this recipe, because they are known as the best for the immune system, but any mushroom will do.

Thai Soup #2
 
Save Print
This recipe includes the quantities I used in my soup.
Author: Recipe Renegade
Ingredients
  • 32 ounces homemade chicken broth, or 2 16.9 oz Boxes of Bone Broth (or Chicken Stock)
  • 6 Garlic Cloves, pressed
  • Thumb-size Ginger Root (about 3 tablespoons, sliced or shredded)
  • 1 Teaspoon Organic Dried Turmeric Powder (or 3-inches of fresh)
  • *3 Medium to Large Tomatoes, blanched with skin removed and diced, or a 15-ouce can of Diced Tomatoes
  • ⅛ Teaspoon Cayenne
  • 1 Medium to Large Diced Onion
  • 1 Cup Shitake (or any) Mushrooms
  • 3 Carrots, sliced
  • 2 Tablespoons Dried Lemongrass or ½ cup chopped fresh Lemongrass
  • Extra tomatoes or water can be added if soup tastes too "hot."
Instructions
  1. After cutting up ingredients into bite-size pieces, place all ingredients in a medium size pot and slow simmer for about 45 minutes. Stir occasionally and be careful not to boil the liquid away.
3.5.3251
Share

Filed Under: Recipes, Side Dishes, V Info

Homemade Sausage

April 21, 2016 By Recipe Renegade Leave a Comment

Share

Do You Eat Pork?

I don’t eat a lot of pork—an occasional bacon for breakfast, maybe a ham for Easter and sometimes home made pork sausage. I only buy local pork and try to keep it to a minimum. Like Dr. Axe says: You eat pork; you have parasites. I don’t worry much about parasites; I fuel my body with no less than a couple handfuls of moringa oleifera every day. Moringa oleifera is said to be anti-parasitic, anti-bacterial, anti-fungal, and anti-viral.

Sausage and French Toast on Rye Round MHC RR
Sausage with Rye French Toast and Fresh Orange Slices

It doesn’t have to be Pork Sausage; Beef Sausage works, too!

I realized if I wanted to avoid pork, I’d have to find another way to make sausage. I was pleasantly surprised when I deviated from pork in this recipe. The first time I made it, I only used half a pound of beef for fear of ruining the entire pound—it was delicious! I’ve not yet tried this recipe with ground chicken or ground turkey, but I’m guessing the ground fennel might need to be replaced with ground rosemary. But that’s only a guess. When I’ve had a chance to make these with poultry, I’ll update this page.

Sausage
 
Save Print
Author: Recipe Renegade
Ingredients
  • 1 Pound Grass-Fed Ground Beef (or Ground Pork)
  • ½ Teaspoon Himalayan Salt
  • ½ Teaspoon Ground Black Pepper
  • ½ Teaspoon Thyme
  • 1 Teaspoon Sage
  • 1 Teaspoon Onion Powder
  • 1Teaspoon Garlic Powder
  • 2 Teaspoons Ground Fennel
  • 2 Teaspoons Demerara or Evaporated Cane Juice/Sugar or ¼ Teaspoon Stevia
  • Instructions
    1. Mix all ingredients in stand mixer until well blended.
  • Divide into 6 or 8 sections and make patties. (I use an old-fashioned ice-cream scoop to measure and flatten with a spatula or with clean hands.)
  • Cook in cast iron pan on medium heat for approximately 4 to 5 minutes on each side or until completely cooked through to middle. The thicker the patty, the longer it will take to cook.
  • 3.5.3251


    Share

    Filed Under: Main Dishes, Meats, Recipes, Side Dishes Tagged With: beef sausage, homemade sausage, How to make home made sausage, pork sausage, what spices are in sausage?

    Easy Way to Cook Winter Squash – No Peeler Required

    November 23, 2015 By Recipe Renegade Leave a Comment

    Share

    Butternut Squash Recipe Renegade

    I can’t count how many times  peeled winter squash before cooking. It seems once I invested in an expensive, sharp vegetable peeler, I then realized peeling wasn’t necessary. Go figure. I like to cook several at a time and freeze in vacuum-seal bags. I make my own bags by using these rolls:

    STEAMED:
    Easy Way to Steam Winter Squash - No Peeler Required
     
    Save Print
    Steamed butternut squash
    Author: Recipe Renegade
    Ingredients
    • Butternut (or other winter squash) Squash
    • 2 Tablespoons Melted Butter
    • 2 Tablespoons Maple Syrup (+-)
    • ¼ Teaspoon Himalayan Salt (+/-)
    Instructions
    1. Carefully and with a sharp chef knife, cut off both ends of squash.
    2. Stand squash up on one end.
    3. Cut in half (lengthwise).
    4. Seeds and pulp can be removed now or after cooking.
    5. Put on cutting board, cut side down, and cut into a couple smaller pieces.
    6. Put into steamer basket and steam for about 35 minutes or until squash is soft.
    7. Remove from steamer and place on cutting board to cool.
    8. If seeds were not removed before cooking, carefully remove them.
    9. Once squash has cooled (about ½ hour depending on thickness of squash), scoop squash out into a mixing bowl.
    10. Add butter, salt, and maple syrup.
    11. Use electric mixer to blend.
    12. Re-heat before serving.
    3.5.3208

    BAKED:
    Easy Way to Bake Winter Squash - No Peeler Required
     
    Save Print
    Baked in Oven
    Author: Recipe Renegade
    Ingredients
    • 1 Butternut (or other winter squash) Squash
    • ¾ Cup Water
    • 2 Tablespoons Melted Butter
    • 2 Tablespoons Maple Syrup (+-)
    • ¼ Teaspoon Himalayan Salt (+/-)
    Instructions
    1. Carefully and with a sharp chef knife, cut off both ends of squash.
    2. Stand squash up on one end.
    3. Cut in half (lengthwise).
    4. Seeds and pulp can be removed now or after cooking.
    5. Place on jelly pan, skin side up.
    6. Add water to pan.
    7. Bake at 400° F for about 35 minutes or until squash is soft.
    8. Remove and place on cutting board or cooling rack to cool.
    9. If seeds were not removed before cooking, carefully remove them.
    10. Once squash has cooled (about ½ hour depending on thickness of squash), scoop squash out into a mixing bowl.
    11. Add butter, salt, and maple syrup.
    12. Use electric mixer to blend.
    13. Re-heat before serving.
    3.5.3208

    Share

    Filed Under: Fruits, Gluten-Free, Recipes, Side Dishes, Vegetables Tagged With: Easy way to cook butternut squash, how to cook squash, how to cook winter squash

    Gluten-Free Green Bean Casserole

    November 20, 2015 By Recipe Renegade 2 Comments

    Share

    This is a great, healthy replacement for traditional green bean casserole that contains unknown or scary ingredients like monosodium glutamate (MSG). AND it’s not only gluten free, it’s delicious! The instructions look long, but it’s easy to make. (Scroll down for do-ahead tip and substitutions if you aren’t worried about gluten-free.) As always, if making the gluten-free version, make certain all ingredients are, in fact, gluten free.

    This recipe cooks up fast – your sauce should be finished before onion rings are done baking. Be sure to gather your ingredients before starting. Scroll down for video.

    Gluten-free Green Bean Casserole Recipe Renegade


    Gluten-Free Green Bean Casserole
     
    Save Print
    Delicious, healthy, green bean casserole! Even your family won't know it's gluten-free!!!
    Author: Recipe Renegade
    Ingredients
    • FOR THE TOPPING:
    • 2 medium Onions, sliced
    • ¼ to ½ Cup Pamela's Baking and Pancake Mix
    • 1 Teaspoon Himalayan or Celtic Salt
    • 1 Small Egg
    • 3 Tablespoons Water
    • FOR THE PAN:
    • 2 Teaspoons Coconut Oil
    • FOR THE CREAM OF MUSHROOM SOUP:
    • 1 pound frozen or fresh, French-style Green Beans
    • 2 tablespoons Butter
    • 12 ounces fresh Mushrooms
    • ½ teaspoon freshly ground Black Pepper
    • 1 teaspoon Himalayan or Celtic Salt
    • ½ teaspoon Onion Powder
    • 2 minced Garlic Cloves (about 1 ½ teaspoon)
    • 1 cup Chicken Broth (bone broth)
    • ½ cup Milk
    • ½ cup Light Cream
    • ¼ cup Arrowroot Powder
    Instructions
    1. MAKE THE ONION RINGS:
    2. Preheat the oven to: 475° F.
    3. Gather ingredients.
    4. Remove green beans from freezer. Place in strainer and rinse with cold water for a few minutes. Set aside to drain and continue thawing.
    5. Coat a sheet pan with coconut oil.
    6. Mix Pamela's Baking and Pancake Mix and Himalayan Salt in a large mixing bowl.
    7. In another bowl, scramble egg with water.
    8. Toss sliced onion rings in egg/water mixture.
    9. Toss onions in bowl with Pamela’s Baking and Pancake Mix and Himalayan Salt to coat.
    10. Spread onions onto jelly pan.
    11. Bake at 475° F for 30 to 35 minutes, flipping every 10 minutes. Onions should be slightly brown when done.
    12. Change oven temperature to 400° F when onions are finished. (Or shut off oven if making casserole for the next day - see "DO-AHEAD TIP below.")
    13. WHILE ONIONS ARE BAKING, MAKE CREAM OF MUSHROOM SOUP:
    14. Chop mushrooms into tiny pieces.
    15. Over medium heat in a 12-inch *skillet, add butter, mushrooms, salt, pepper, and onion powder.
    16. Cook over medium heat for about 5 minutes or until mushrooms start to turn slightly brown.
    17. Add fresh garlic and cook for additional minute.
    18. Add chicken broth, milk and cream.
    19. Sprinkle arrowroot powder on top using a metal strainer and quickly stir in. (Mixture will thicken quite fast and you don't want it to lump.)
    20. Remove from heat and stir in ¼ of the baked onions and all of the green beans.
    21. Top with the remaining onions.
    22. Bake at 400° for 15 minutes or until bubbly. Serve immediately.
    Notes
    *If using cast-iron skillet for cooking mushroom sauce, casserole can be baked in the same skillet.

    DO-AHEAD TIP: Once cooled (about 20 to 30 minutes), refrigerate. Cook at 350° F for 30 minutes.
    3.3.3077

    Do-ahead Tip: Make casserole the day before and once cooled, refrigerate. When ready to eat, bake at 350° for 30 minutes or until bubbly.

    Substitutions: FOR CASSEROLE THAT IS NOT GLUTEN-FREE – 2 tablespoons all-purpose flour can be substituted for the arrowroot powder in the soup and 1/4 to 1/2 cup all-purpose flour can be substituted for the Pamela’s Baking and Pancake Mix for the onion rings. (Honestly, I think the onion rings are crispier and taste MUCH better using the Pamela’s Baking and Pancake Mix.)

    Whole milk can be substituted for the milk and cream.

    Share

    Filed Under: Gluten-Free, Recipes, Side Dishes

    How to Correctly Cook Quinoa

    October 28, 2015 By Recipe Renegade 3 Comments

    Share

    Quinoa Recipe Renegade

    If you found this page by searching, “How to Cook Quinoa,” you might already know that it’s a nutritious seed often mistakenly referred to as a ‘grain.’ (We wouldn’t say a sunflower seed is a flower, right?) Quinoa is high in protein and its nutritional profile is similar to a grain.

    Rinse and Soak

    If you don’t want to complain about the taste of quinoa, you’ll want to rinse and soak it before cooking to remove both phytic acid and bitterness. Phytic acid, known as an anti-nutrient, interferes with absorption of some important nutrients. At the same time, it might also be a good chelator for unwanted minerals. (I think the jury is still out on whether or not there is a health benefit to phytic acid.)

    I usually rinse, then soak for anywhere from six to twelve hours. Never let it go more than eight hours without rinsing and I always rinse again before cooking. If there’s no time to soak it before cooking, be sure to rinse several times. Mason jars with sprouting caps work great for both soaking and rinsing. Quinoa cooks much quicker, after it’s been soaked.

    We purchase food by weight, but we measure it by volume when we cook. A 12-ounce bag of quinoa seeds measures about 2 cups. Scroll down to see the picture of how one cup grows in size. You can see how it goes a long way.

    This seed is a powerhouse of nutrients, including protein. It can easily replace brown rice in many recipes and is  You can see the complete nutrient profile here: USDA Nutrient Database.

    If you’re not sure if this seed would be too high-carb for you, the information in this article by Dr. William Davis, author of Wheat belly, might help. Can I eat quinoa? Carb-Counting Basics


    How to Cook Quinoa
     
    Save Print
    1 cup dry quinoa seeds makes 4 cups cooked quinoa.
    Author: Recipe Renegade
    Ingredients
    • 1 Cup Quinoa Seeds
    • 2 Cups Water
    • Water for rinsing
    Instructions
    1. Place Quinoa Seeds in a one-quart Mason jar
    2. Secure strainer cover onto top of Mason jar.
    3. Rinse seeds.
    4. Add 2 cups water to Mason jar.
    5. Soak for 8 to 12 hours (Rinse at 8 hours).
    6. Rinse again (before cooking) to remove phytic acid/bitterness.
    7. Remove water.

      TO COOK:
    8. Place seeds in pot on stove.
    9. Add enough water to cover seeds plus about ½ inch.
    10. Cover pot.
    11. Bring to boil.
    12. Simmer for approximately 10 minutes checking water level.
    13. If quinoa is not cooked after 10 minutes, remove from burner and keep covered for 5 minutes.
      (Quinoa is done when rings are visible.)
    Notes
    A mesh strainer can be used if you don't have a strainer cover for your Mason jar. Be sure to use a strainer with extremely small holes. If the strainer holes are not small enough, the seeds will slip right through. Do NOT use a colander.
    3.5.3226

    This is a great strainer set. It can be used for not only quinoa, but also for kefir grains and Kombucha.

    One cup dry quinoa seeds equals 4 cups cooked.
    One cup dry equals 4 cups cooked.


    Share

    Filed Under: Blog, Gluten-Free, Recipes, Side Dishes Tagged With: always soak quinoa before cooking, How to cook quinoa, How to remove bitterness from quinoa, is quinoa a grain?, is quinoa a seed?, The right way to cook quinoa, why is my quinoa bitter?

    Sauerkraut

    September 16, 2015 By Recipe Renegade 1 Comment

    Share

    Fermenting was a lost art that is making a comeback. Although it was intimidating when I first tried fermenting, I quickly learned how easy it is. What a great, inexpensive way to populate the gut with probiotics  (good bacteria and yeast). Sauerkraut fermenting is an anaerobic (without oxygen) process as opposed to Kombucha and Milk Kefir which are aerobic (with oxygen) processes.

    Sauerkraut Recipe Renegade


    With any fermentation process, it is important to keep out pathogens. I typically use a paper towel or dishcloth with a rubber band around the jar for aerobic ferments and an airlock for anaerobic ferments. The airlock allows gases to escape and does not allow pathogens into the ferment. If not using an airlock for anaerobic ferments, yeasts and molds can easily enter the ferment. Personally, I’d rather not have to worry about figuring out if that weird growth on top is a safe-to-eat yeast or a dangerous mold. If a dangerous mold grows on top, the entire ferment needs to find its way to the garbage. For the low price of an airlock today, I’d rather play it safe!

    If you don’t have time to make your own, try this one from Amazon: Organic Hamptons Brine Artisinal Sauerkraut Classic

    I adapted this recipe from Nourishing Traditions cookbook by Sally Fallon and Mary Enig.


    Sauerkraut
     
    Save Print
    Sauerkraut - Fermented Cabbage
    Author: Recipe Renegade
    Ingredients
    • 1 Tablespoon Celtic Salt or Himalayan Salt
    • ¼ Cup Liquid Whey (strained from yogurt or cheese NOT powder)
    • Cored and Shredded Small Cabbage
    • Water (without chlorine or fluoride)
    Instructions
    1. Remove outer leaves of cabbage and set aside.
    2. Shred cabbage and place in large plastic bowl.
    3. Sprinkle salt over cabbage.
    4. Using a wooden pounder (tamper, stomper), pound cabbage. (A mallet-type meat tenderizer will also work for this step.)
    5. Let sit for one hour to release juices.
    6. Tightly stuff cabbage and juice into 2-quart mason jar, using pounder to tamp down.
    7. Cover with saved cabbage leaf.
    8. Add liquid whey.
    9. Add un-chlorinated, un-fluoridated water to within a few inches of the top.
    10. Add weight.
    11. Fill with clean un-chlorinated, un-fluoridated water leaving one inch of air space on top.
    12. Cover with lid that has airlock.
    13. Sit on counter top (place towel or tray underneath in case it leaks) and allow to ferment for 4 days.
    14. Store in refrigerator.
    15. NOTE: If whey is not available, add 1 extra tablespoon of salt. DO NOT USE POWDERED WHEY!
    3.3.3077

    Along with the whey, salt, cabbage, and water, supplies I like to use for fermenting are: pounder, large plastic bowl, glass (non-lead) vessel(s) to hold about 2 quarts cabbage (about one head of cabbage), a weight to hold the cabbage down under the water, and airlock lid. Patience is required—4 days is minimum, and it’s said to be best after storing in refrigerator for 6 months.

    The only items I recall my mom using for fermenting when I was a kid were a crock, a plate, and a clean rock for holding the plate/cabbage under the water. She also fermented in the basement, which I’m sure probably contained lots of mold. There are some molds that are okay and can be skimmed off and other molds that require the entire ferment be thrown out. Honestly, I’d rather not need to learn the difference—I’d rather simply use an airlock. It’s not necessary, but I sure feel better using one.  (If you’re a do-it-your-self type, it’s possible to add an airlock to most any plastic or metal lid.) Scroll down below the recipe to see my supplies.

    I find it’s easier to shred the cabbage cutting it into strips with a sharp knife rather than a food processor.Salted Cabbage Recipe Renegade

    I don’t remember where my first recipe came from, but I couldn’t eat it. The recipe didn’t use whey, so the salt was doubled. It also called for juniper berries. I’m not a fan of anything juniper (I should have known to leave them out) and I love salt, but the sauerkraut turned out way too salty! When less salt is used, because whey is substituted, it’s much more palatable in my humble opinion.

    Below are my fermenting supplies. I place the small jar (right side up) on top of the cabbage leaf to help keep the cabbage under the water. The solid cover is for after the cabbage becomes sauerkraut:

    Fermenting Supplies Recipe RenegadeIf liquid whey from home-made yogurt is not available, it is possible to use store-bought yogurt. Unfortunately, there’s no guarantee there will be live cultures in *commercial yogurt. If possible, find someone who makes yogurt or cheese and beg for liquid whey!

    *According to world-renowned food formulator, Russ Bianchi’s January 12, 2013 blog post, “Yogurt is complete JUNK FOOD, full of harmful acids, sugars, fake color and flavors, genetically modified starches, colloids, gums, preservatives, stabilizers, emulsifiers, with non-absorbable nutrients or fortification because it is cooked to at least 238 degrees F for a dwell period defined by USDA regulations that KILLS any alleged benefit of nutrient value!”


    Share

    Filed Under: Fermented Foods, Gluten-Free, Recipes, Side Dishes Tagged With: how to ferment cabbage, how to make sauerkraut, how to use whey in sauerkraut, low salt sauerkraut recipe, sauerkraut recipe

    Next Page »

    Primary Sidebar

    Search

    Fullscript

    You'll automatically receive 20% off your account at my Fullscript Dispensary.

    My Metabolic Meals are: 100% Gluten-free, and contain no: artificial flavors or dyes, MSG, soy, wheat, rye, barley, malt, or triticale, Brewer’s yeast, low-grade proteins, processed vegetable oils.

    Follow me on:

    Please be advised:

    Statements on this website have not been evaluated by the FDA and are NOT intended to diagnose, prescribe, treat, prevent or cure any disease, condition, illness, or injury. Please do not use any information on this website in place of a doctor. Please consult a doctor before making ANY dietary changes. This website is presented for entertainment purposes only.

    AFFILIATE DISCLOSURE:

    AFFILIATE DISCLOSURE: Throughout this website, you will find affiliate links. Any links you follow may or may not provide remuneration to help me support this website. Please note that any reviews will be honest reviews regardless of monetary compensation. Make Healthier Choices is a participant in the Amazon Services LLC Associates Program, an affiliate advertising program designed to provide a means for sites to earn advertising fees by advertising and linking to Amazon.com.

    My Favorite Kitchen Appliance

    I use this air fryer every day. I can not only air fry, I can bake, toast, defrost and much, much more.

    Archives

    • May 2025
    • March 2025
    • January 2025
    • December 2022
    • October 2022
    • August 2022
    • March 2022
    • September 2021
    • May 2021
    • November 2020
    • January 2020
    • January 2018
    • March 2017
    • February 2017
    • August 2016
    • May 2016
    • April 2016
    • March 2016
    • February 2016
    • January 2016
    • December 2015
    • November 2015
    • October 2015
    • September 2015
    • August 2015
    • July 2015
    • June 2015
    • May 2015
    • Welcome
    • Recipes
    • About Lynn
    • Ingredients & Substitutions
    • Affiliate Disclosure
    • Articles

    Copyright © 2025 · Make Healthier Choices · Log in