• Skip to primary navigation
  • Skip to main content
  • Skip to primary sidebar

Make Healthier Choices

Helping people Make Healthier Choices about real-food choices for optimal heath.

SEARCH

  • Home
  • Welcome
  • Free Body Scan
  • My Metabolic Meals
    • My Favorite Metabolic Meals
  • Recipes
    • Beverages
      • Audrey’s Pine Needle Tea
    • Bread
    • Candy
    • Desserts
    • DIY Recipes
      • DIY – Body
      • DIY – Household
      • DIY – Pets
      • Essential OIls
    • Fermented Foods
    • Free Recipes
    • Fruits
    • Main Dishes
      • Katherine’s White Chicken Chili
    • Meats
    • Pet Recipes
    • Salads
    • Sauces
    • Side Dishes
    • Snacks
    • Soup
      • Thai Soup – Immune-Building Soup
    • Spices
    • Vegetables
  • Recipes by Category
    • Gluten-Free
  • Blog
    • Articles
    • Ingredients & Substitutions
    • Reviews
  • About
    • Affiliate Disclosure
    • Contact me
    • Disclaimer
    • How I Overcame Sickness
  • The FUN Stuff
    • Sweepstakes
    • Take a Quiz
    • Free e-Books
  • Save on My Favorite Products
  • V Info

Archives for September 2015

Please Don’t Eat Your Babies!

September 10, 2015 By Recipe Renegade Leave a Comment

Share

Milk Kefir Myths

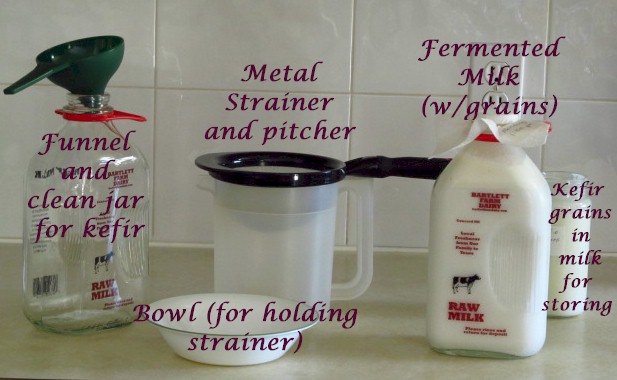
There’s lots of misinformation on the internet–especially when it comes to milk kefir and other ferments. I watched a great video not too long ago that explained exactly how to make milk kefir. There were lots of people commenting that the instructions were wrong. This person had been making milk kefir for years, hadn’t killed the grains, and had successfully made kefir. So how wrong could those instructions have been? The only thing I disagreed with in their video, was the use of a colander to strain out the grains instead of a metal, fine-mesh strainer.

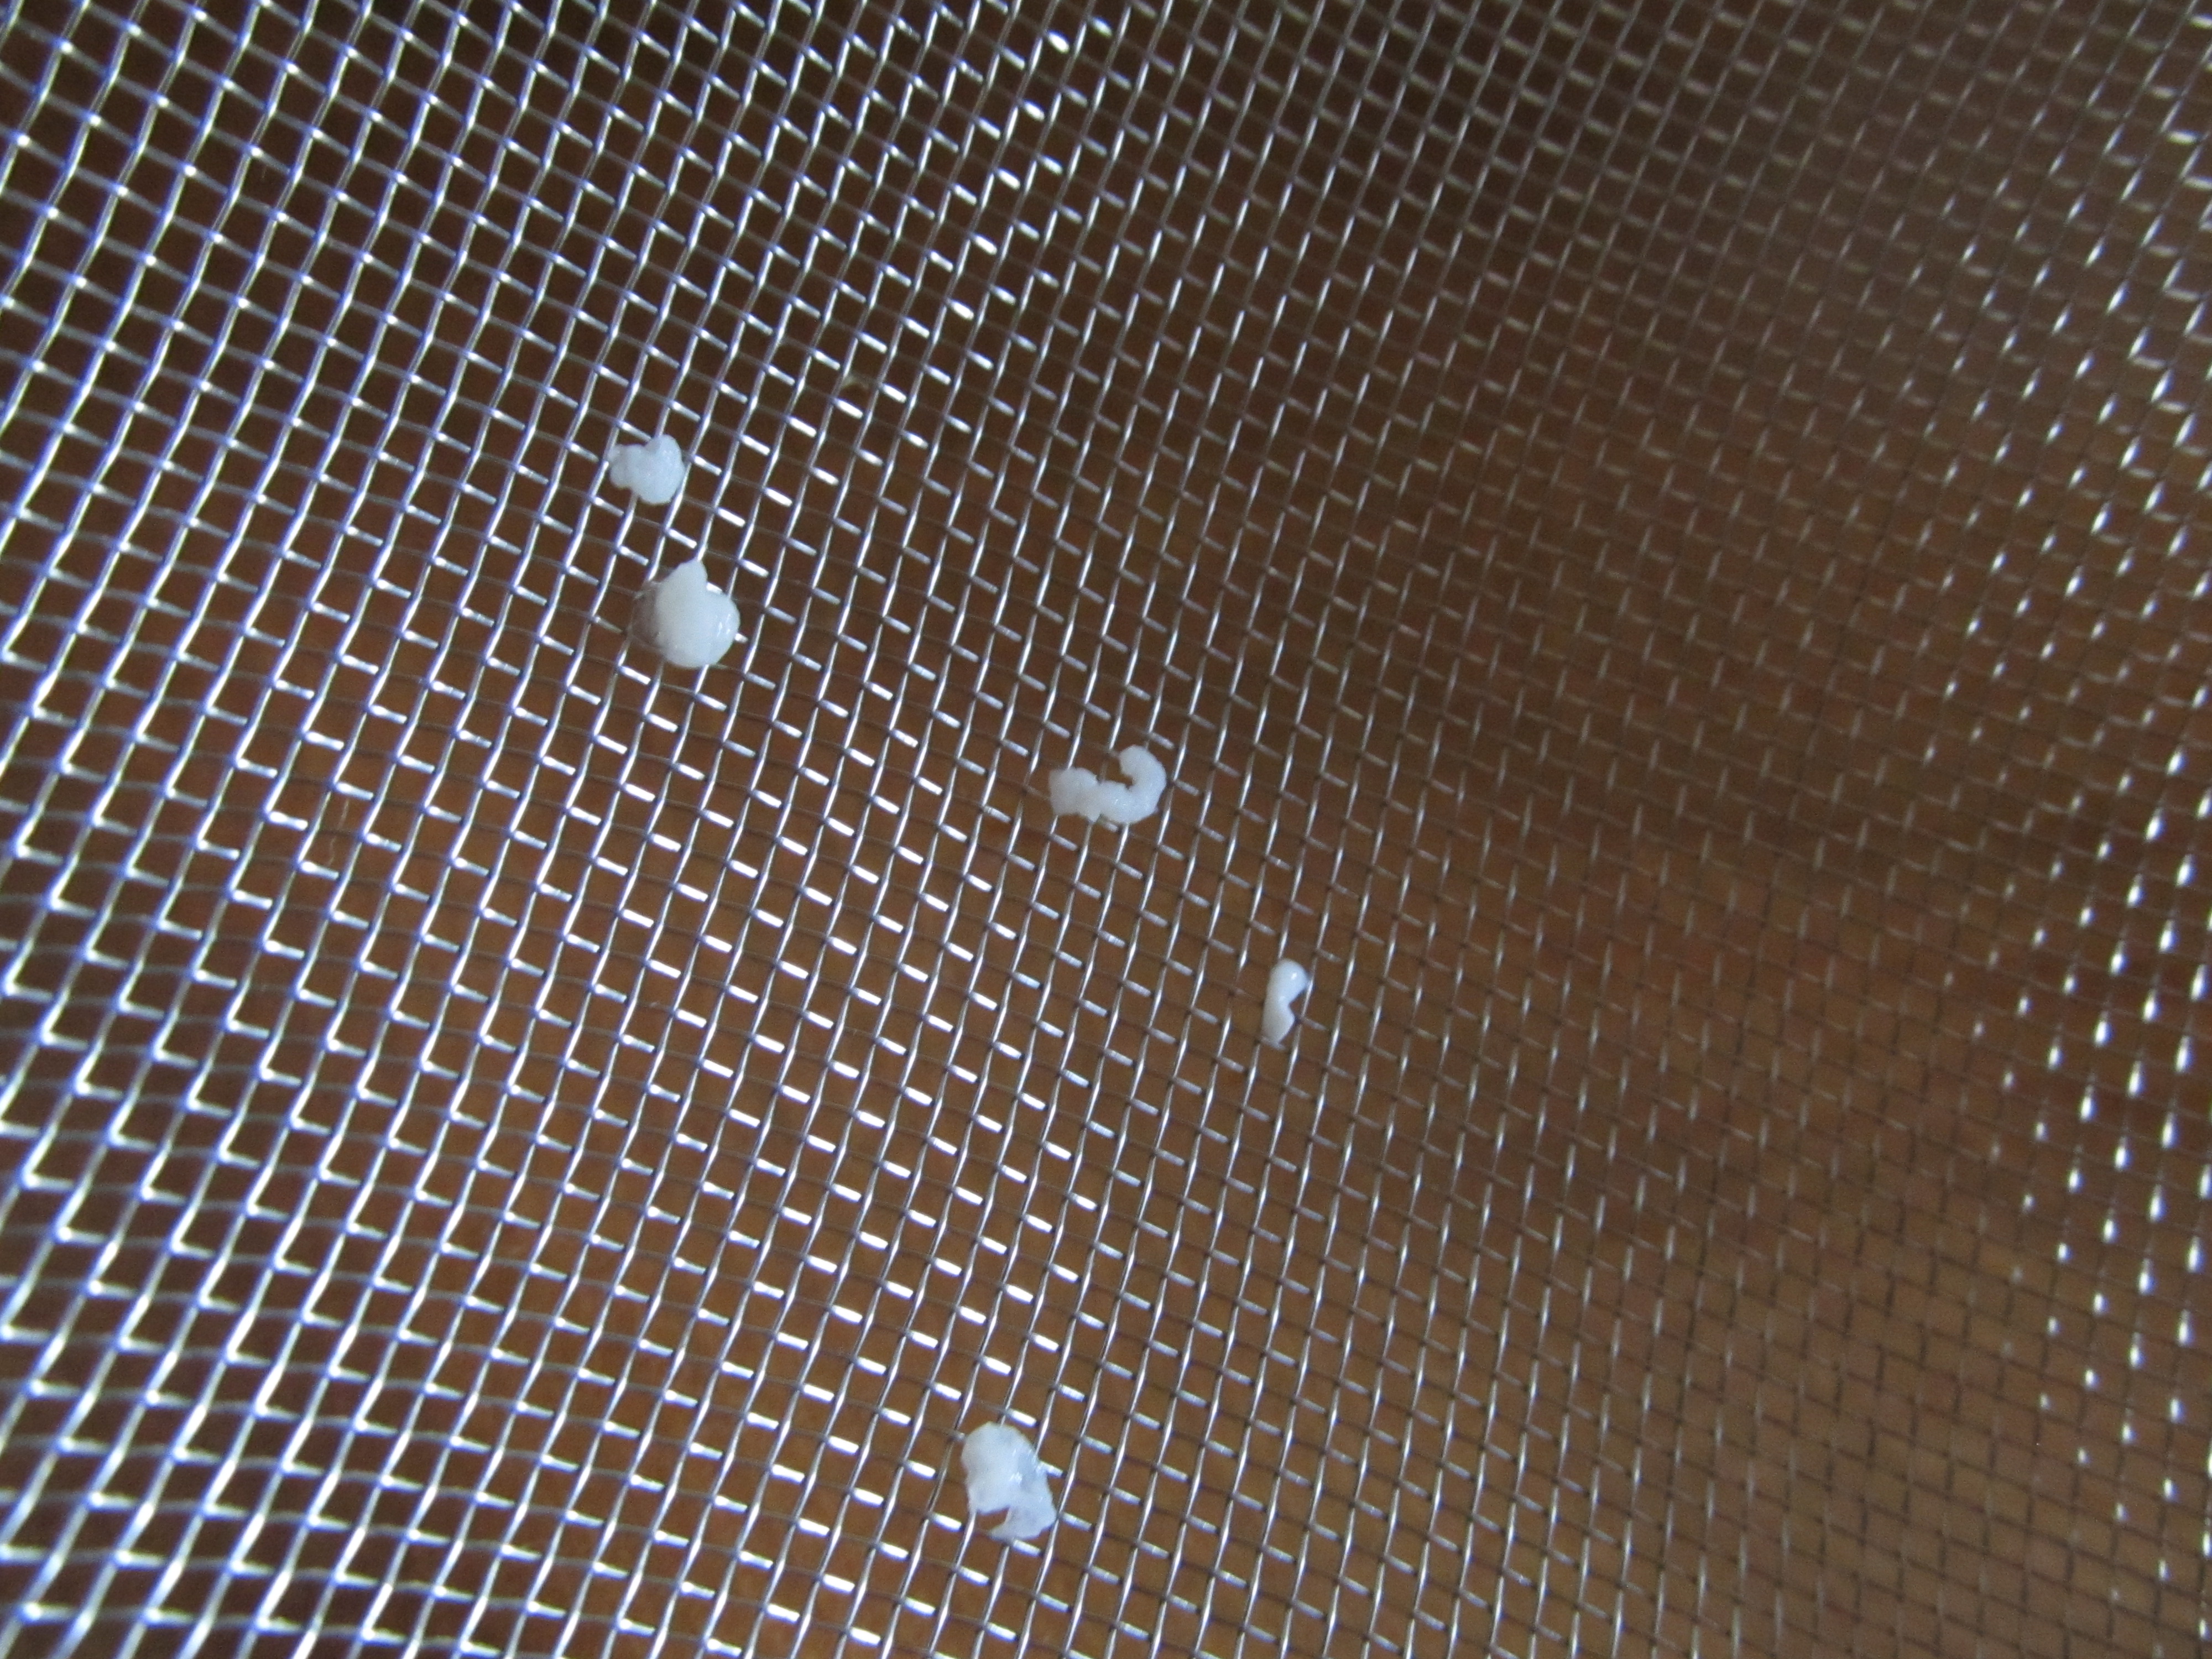
Many people use a plastic colander to strain their grains when the kefir is finished because they’ve been misinformed (as I was) about using metal with kefir grains and other ferments. Using a plastic mesh strainer might be okay for water kefir, but is impossible for milk kefir; it takes forever for the kefir to strain through. Using a colander with big holes allows the babies to slip through and yes, you’re eating/drinking your babies. It’s not that it is wrong to eat your baby kefir grains; you miss out on growing extras that can be gifted to friends and family, or sold. If you use a metal, fine-mesh strainer, you can rinse the strainer and see the small babies left behind. Yes, those are the babies you are eating since they’re slipping through the colander holes. Using a metal, fine-mesh strainer makes it easy to save those small babies so you can let them grow, dry them for later, or give them to a friend.

Stainless Steel Is Okay To Use

IMG_4349
Milk Kefir Baby Grains (SCOBY – Symbiotic Colony of Bacteria and Yeast)

Now you’re saying, “you can’t use metal with kefir grains.” Sorry. You’re wrong. Stainless steel is fine. Do not use any other metal and make certain the metal you’re using is, in fact, stainless steel. I’ve been using stainless steel for years and never had a problem. I personally wouldn’t store kefir or the grains in metal or even plastic–I always use glass. And yes, it’s perfectly fine to use a stainless-steel spoon to transfer the grains. If you feel better using a plastic colander, at least line it with a fine mesh cheesecloth like this one so you don’t unknowingly eat/drink your babies.


It’s Easy to Wake Up Your Kefir Grains

If using pasteurized milk, there’s nothing special to do when you receive your grains other than if they’re dried, they need to be re-hydrated (activated). Follow the instructions that came with your grains. If using raw milk, they must be transitioned. Raw milk contains bacteria that the kefir grains need to get used to.

If you don’t have time for making milk kefir, check out high-quality probiotics here at my Fullscript Store:


Make Healthier Choice’s Fullscript Store

20% off and free shipping at $50!


I don’t ever rinse my kefir grains unless they’ve been sitting in the refrigerator for an extended period, because rinsing can weaken them. The only other time is after I strain my kefir, I rinse the bottle and strainer to find the babies. You’ll know if your grains need a rinse. They can go right from milk kefir into the new milk.  NEVER rinse kefir grains with chlorinated or fluoridated water, as these chemicals can damage them. Chlorine’s job in the water is to kill bacteria, so you can imagine it would also kill the good bacteria in the grains.
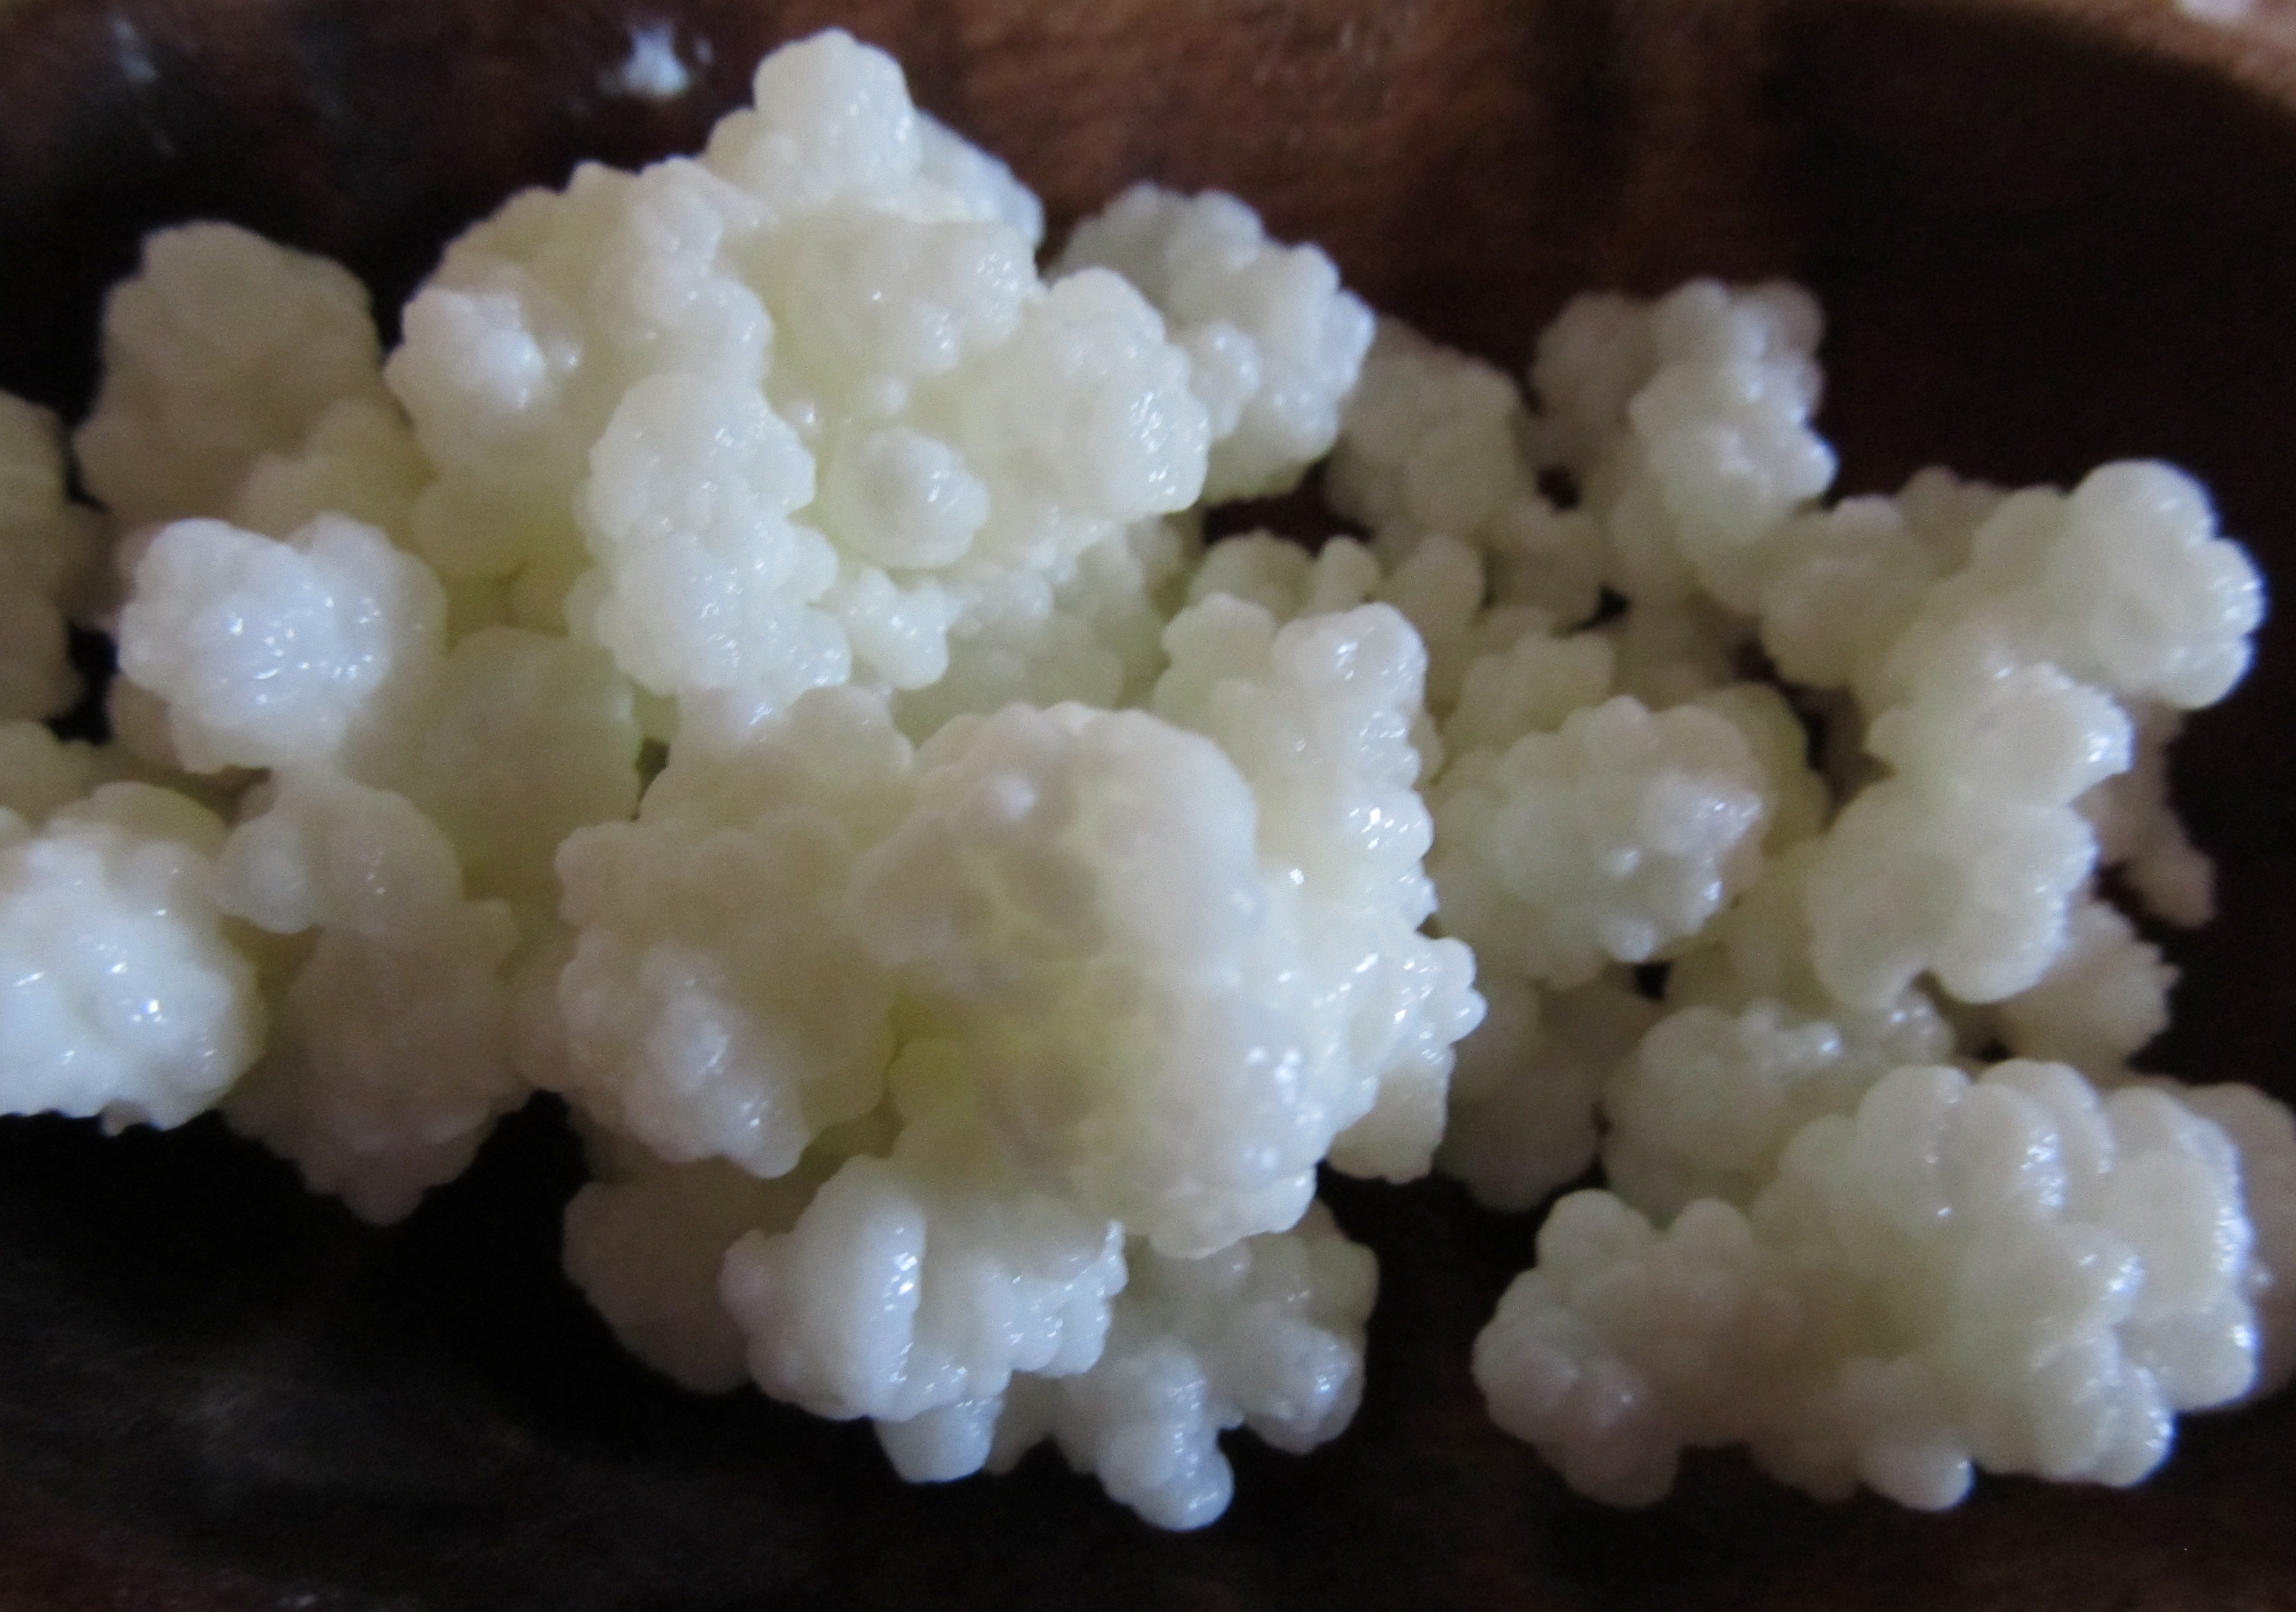
They’re Not Grains

Remember that the Grain in Kefir Grain doesn’t mean it’s a true grain; it’s a SCOBY – a Symbiotic Colony of Bacteria and Yeast. They are living organisms and it’s important to take good care of them. Keeping them alive can sometimes be a challenge, especially if a vacation is on the schedule. I keep mine, tightly covered, in fresh, raw milk in a glass jar in the refrigerator for about two weeks. They’ve gone a bit longer and survived, but I try to give them new milk every two weeks.

Kefir grains actually look more like cauliflower than they do a grain:

Milk Kefir Grains
Milk Kefir Grains (SCOBY – Symbiotic Colony of Bacteria and Yeast)

Learn how to make Milk Kefir.

Here’s a short how-to video:

Share

Filed Under: Articles, Blog, Fermented Foods, Recipes Tagged With: fine mesh cheesecloth for straining kombucha, How to make milk kefir, milk kefir, milk kefir grains, water kefir, what are milk kefir grains, why are they caled milk kefir grains?

Milk Kefir

September 9, 2015 By Recipe Renegade 4 Comments

Share

Milk kefir is one of the quickest and easiest ferments to make and it contains a high quantity of beneficial bacteria. There’s nothing special to chop, steep, heat up, or cool down. Place milk and kefir grains into a glass jar, cover with breathable fabric, and wait. Strain to remove grains, chill, and drink. It’s that easy!

Milk Kefir Recipe Renegade


Milk Kefir
 
Save Print
Milk kefir is a great way to populate the gut with good bacteria - also known as "probiotics." Goat's milk is the healthiest option, since it's closest to human milk.
Author: Recipe Renegade
Ingredients
  • 2 Quarts Milk
  • 1 Teaspoon Kefir Grains
Instructions
  1. Place milk in glass jar.
  2. Add Kefir grains.
  3. Cover with paper towel, coffee filter or dish towel (breathable fabric) and secure with rubber band or string.
  4. Let sit at room temperature for about 24 hours.
  5. Check to see if it's done fermenting by slightly tilting. If milk pulls away from sides in a solid mass, it's ready to strain.
  6. When finished, strain to remove kefir grains.
  7. Store finished kefir in glass jar in refrigerator (or it will continue to ferment).
  8. Re-use grains to make another batch of kefir or store them in glass jar in refrigerator in fresh milk for one week.
3.5.3208

Milk will ferment more quickly in warmer temperatures and more slowly in cooler temperatures. In the summer, my goat milk ferments  in about 22 hours and cow’s milk takes about 24 to 36, while in the winter it can take a couple of days.

Never use ultra-high pasteurized milk. I use raw cow’s milk or raw goat’s milk, but I’ll be honest-I don’t love the taste, especially when I use goat’s milk. I add maple syrup or hide it in a smoothie to make it palatable. If I use it in a smoothie, I add it last and mix it in on the slowest speed so that I’m not disturbing the bacteria.

Check to see if milk is adequately fermented by slightly tipping the bottle. If it separates from the side in a solid mass that’s similar to yogurt, it is done. Once the milk is fermented, strain using only a stainless-steel, mesh strainer (don’t believe those rumors that you can’t use metal, but make certain it’s stainless) to remove grains. Store finished kefir in glass jar in refrigerator and use grains to make another batch of kefir. If the grains won’t be immediately used again to make another batch, store them in fresh milk in a tightly-covered glass jar in refrigerator for up to a week. (I’ve been able to store mine for up to about two weeks. Keep in mind that not changing the milk sooner risks losing the grains.)

If the milk ferments for too long, it will separate into curds and whey. If you’re not familiar with whey, this is what it looks like – it’s the “watery” looking liquid:

Milk Kefir Whey


The kefir won’t be ruined if it goes that far–just strain as quickly as possible and shake before drinking.

Supplies I use for fermenting and straining:

milk kefir 5

Page 2 Please Don’t Eat Your Babies! Click here for lots more info about Milk Kefir (continued) 

Short how-to video:


Share

Filed Under: Fermented Foods, Gluten-Free, Recipes Tagged With: how hard is it to make milk kefir, How to make milk kefir

Not Your Typical 3-Bean Salad

September 2, 2015 By Recipe Renegade Leave a Comment

Share

Bean Salad Recipe RenegadeAside from re-hydrating the sun-dried tomatoes, this colorful, vegan bean salad goes together in minutes and is a hit at any party! You don’t have to use the three beans in the recipe, any three will work. I’ve used butter beans, kidney beans and Roman beans. I always use black and alternate the other two. I’ve often used jarred tomatoes in olive oil, some even containing Italian seasoning. If using this kind, just omit the olive oil and/or Italian seasoning called for in the recipe. Tomatoes can also be re-hydrated overnight for use the next day.


Bean Salad
 
Save Print
Easy to make Bean Salad.
Author: Recipe Renegade
Ingredients
  • Organic ingredients:
  • One 15 oz. Can Unsalted Pinto Beans
  • One 15 oz. CanUnsalted Navy Beans
  • One 15 oz. Can Unsalted Black Beans
  • 3 oz. Sun-Dried Tomatoes
  • ⅓ cup Olive Oil
  • 10 oz. Corn
  • 1 Teaspoon Garlic Powder
  • 1 Tablespoon Italian Seasoning
  • ¼ Teaspoon Black Pepper
  • *1 Teaspoon Himalayan or Celtic Salt (Do not add if beans are salted)
  • 2 Tablespoons Chopped Basil
  • Several Basil Leaves for Garnish
  • PLEASE NOTE: If using salted beans, do not use additional salt; taste before adding.
Instructions
  1. Chop tomatoes into bite-size pieces.
  2. Place tomatoes and olive oil in small bowl; let re-hydrate for 30 minutes.
  3. Drain and thoroughly rinse beans.
  4. In large bowl, place beans, corn, garlic powder, Italian seasoning, black pepper, and salt.
  5. Once re-hydrated, add tomatoes.
  6. Mix all together.
  7. Mix in chopped basil just before serving. (It will wilt if left in too long.)
  8. Garnish top with basil leaves.
3.3.3077


Share

Filed Under: Gluten-Free, Recipes, Salads, Side Dishes Tagged With: easy 3 bean salad, good paleo recipe, party recipe, vegan recipe

« Previous Page

Primary Sidebar

Search

Click for more information.

Follow me on:

Please be advised:

Statements on this website have not been evaluated by the FDA and are NOT intended to diagnose, prescribe, treat, prevent or cure any disease, condition, illness, or injury. Please do not use any information on this website in place of a doctor. Please consult a doctor before making ANY dietary changes.

AFFILIATE DISCLOSURE:

AFFILIATE DISCLOSURE: Throughout this website, you will find affiliate links. Any links you click on may or may not provide remuneration to help me support this website. Please note that any reviews will be honest reviews regardless of monetary compensation. Make Healthier Choices is a participant in the Amazon Services LLC Associates Program, an affiliate advertising program designed to provide a means for sites to earn advertising fees by advertising and linking to Amazon.com. Please be advised that Lynn McGovern, d/b/a Make Healthier Choices, is an Independent Zija International Distributor which includes Améo Essential Oils and Ripstix Supplements.

My Favorite Kitchen Appliance

I use this air fryer every day. I can not only air fry, I can bake, toast, defrost and much, much more.

Archives

  • March 2025
  • January 2025
  • December 2022
  • October 2022
  • August 2022
  • March 2022
  • September 2021
  • May 2021
  • November 2020
  • January 2020
  • January 2018
  • March 2017
  • February 2017
  • August 2016
  • May 2016
  • April 2016
  • March 2016
  • February 2016
  • January 2016
  • December 2015
  • November 2015
  • October 2015
  • September 2015
  • August 2015
  • July 2015
  • June 2015
  • May 2015
  • Welcome
  • Recipes
  • About Lynn
  • Ingredients & Substitutions
  • Affiliate Disclosure
  • Articles

Copyright © 2025 · Make Healthier Choices · Log in